
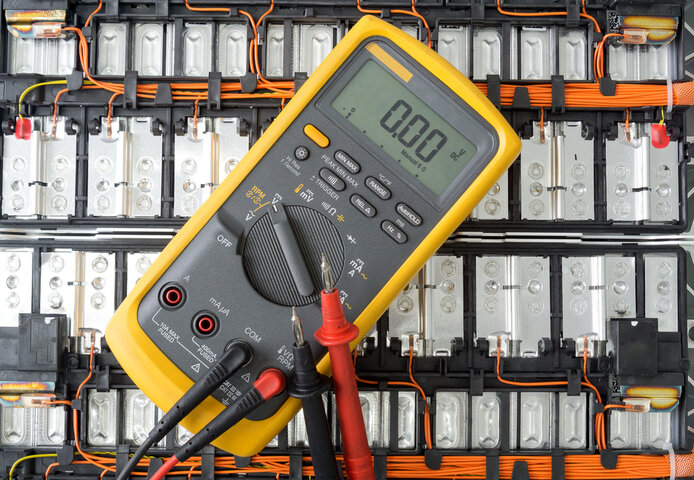
Lithium-ion batteries power everything from smartphones to solar setups. But how do you know if your battery is still healthy?
Regular testing ensures safety, longevity, and optimal performance. Without proper checks, a battery can degrade, leading to reduced efficiency or even failure.
In this post, you’ll learn simple yet effective ways to test lithium-ion batteries. We’ll cover voltage checks, capacity testing, load performance, and more. Whether for electronics, vehicles, or solar systems, these methods will help keep your battery in top condition.
Why Testing Lithium-Ion Batteries is Important
Lithium-ion batteries power many everyday devices, from smartphones to electric vehicles. However, without proper testing, they can degrade, lose efficiency, or even pose safety risks. Regular testing ensures your battery operates safely and lasts longer.
Ensuring Safety, Longevity, and Optimal Performance
A faulty lithium-ion battery can overheat, swell, or even explode. Testing helps detect issues early, preventing potential hazards. Regular monitoring also extends battery life by ensuring it is charged and discharged correctly. Well-maintained batteries deliver consistent power, enhancing device performance.
Identifying Issues Before They Cause Problems
Battery failures often start with small inefficiencies that go unnoticed. Testing helps spot early warning signs like:
- Voltage Drops: Sudden decreases in voltage may indicate a weakening battery.
- Increased Internal Resistance: A rise in resistance suggests aging cells that struggle to deliver power efficiently.
- Self-Discharge: If a battery loses charge quickly when not in use, it may be degrading.
By catching these problems early, you can prevent unexpected failures in critical applications like medical devices or power storage systems.
Regular Testing Reveals Battery Health and Efficiency
To understand how well your battery is performing, compare test results over time. The table below shows key battery health indicators:
| Test Parameter | Healthy Battery Range | Warning Signs | Potential Issues |
|---|---|---|---|
| Voltage | Nominal rating ±5% | Below 20% of rated value | Degradation, deep discharge |
| Internal Resistance | Low and stable | Gradual increase | Aging, poor conductivity |
| Self-Discharge | Minimal loss over weeks | Significant loss in days | Internal cell damage |
| Capacity | Near original rating | Noticeable drop in Ah | Reduced efficiency |
Performing routine tests helps track these metrics, ensuring your battery remains in peak condition.
Key Battery Metrics
Testing a lithium-ion battery involves measuring four critical metrics: voltage, capacity, internal resistance, and self-discharge rate. These factors determine performance, longevity, and overall health.
Voltage: Charge Level and Battery Health
Voltage indicates how much charge remains. A healthy 3.7V lithium-ion battery should read:
- 4.1V – 4.2V → Fully charged
- 3.7V → Nominal voltage
- Below 3V → Deeply discharged or damaged
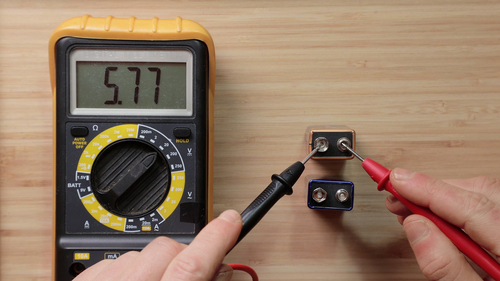
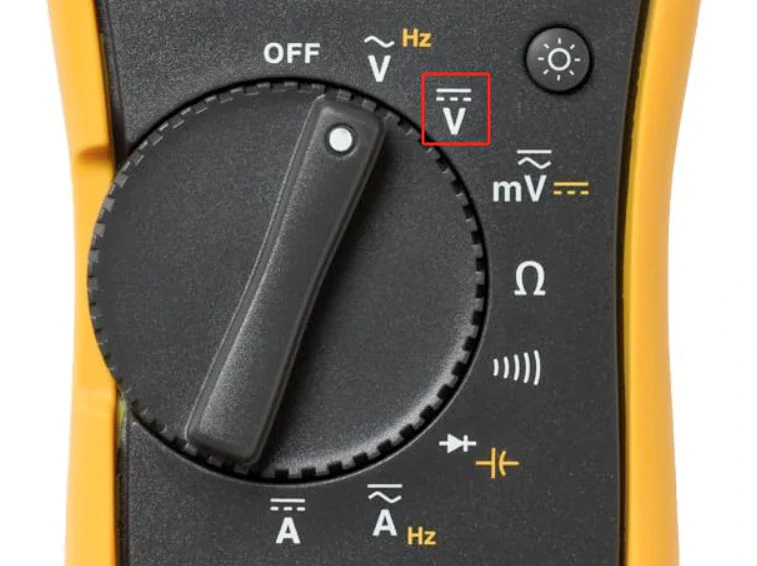
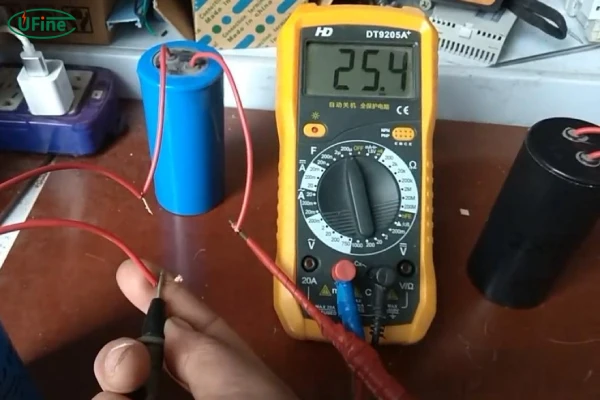
How to Test Voltage
- Set a multimeter to DC voltage mode.
- Place the red probe on the positive terminal, black on negative.
- Read the voltage. A drop below 2.5V may cause permanent damage.
⚠️ Warning: Lithium-ion batteries discharged below 2.5V risk capacity loss or failure.
Capacity: Total Charge a Battery Stores
Capacity, measured in amp-hours (Ah) or milliamp-hours (mAh), determines how long a battery can power a device. Aging reduces capacity, leading to shorter run times.
Why Capacity Testing Matters
- Identifies loss of storage over time
- Ensures a battery holds enough charge
- Helps compare rated vs. actual capacity
How to Measure Capacity
- Fully charge the battery.
- Discharge it through a known load.
- Track ampere-hours (Ah) until it reaches a cutoff voltage.
- Compare results to the original rating.
| Battery Type | Rated Capacity | Expected After 500 Cycles |
|---|---|---|
| Smartphone (3.7V) | 3,000 mAh | 2,500 mAh |
| Solar Battery (12V) | 100 Ah | 85-90 Ah |
Internal Resistance: Indicator of Efficiency
Internal resistance affects power delivery. Higher resistance means less efficiency, generating more heat and reducing performance.
How Internal Resistance Changes Over Time
- Low resistance → Healthy battery, efficient power output
- Increasing resistance → Aging, slower charge/discharge rates
- Very high resistance → Severe degradation, potential failure
How to Test Internal Resistance
- Use a multimeter or battery tester in resistance mode.
- Measure the resistance across battery terminals.
- Compare past readings—rising values indicate deterioration.
Self-Discharge Rate: Battery’s Ability to Retain Charge
Lithium-ion batteries should hold charge efficiently when unused. A high self-discharge rate signals internal wear or faults.
How to Test Self-Discharge
- Fully charge the battery.
- Leave it disconnected for several days or weeks.
- Recheck voltage using a multimeter.
- If voltage drops significantly, self-discharge is excessive.
| Battery Condition | Expected Self-Discharge |
|---|---|
| New & Healthy | 2-3% per month |
| Slightly Aged | 3-5% per month |
| Degraded | 10%+ per month |
Tools Required for Testing
Testing a lithium-ion battery requires precision, safety, and accuracy. Using the right tools ensures reliable results while preventing damage to the battery or testing equipment. Below are the essential tools.
Multimeter (Digital/Analog)
A multimeter is the primary tool for testing voltage, internal resistance, and capacity.
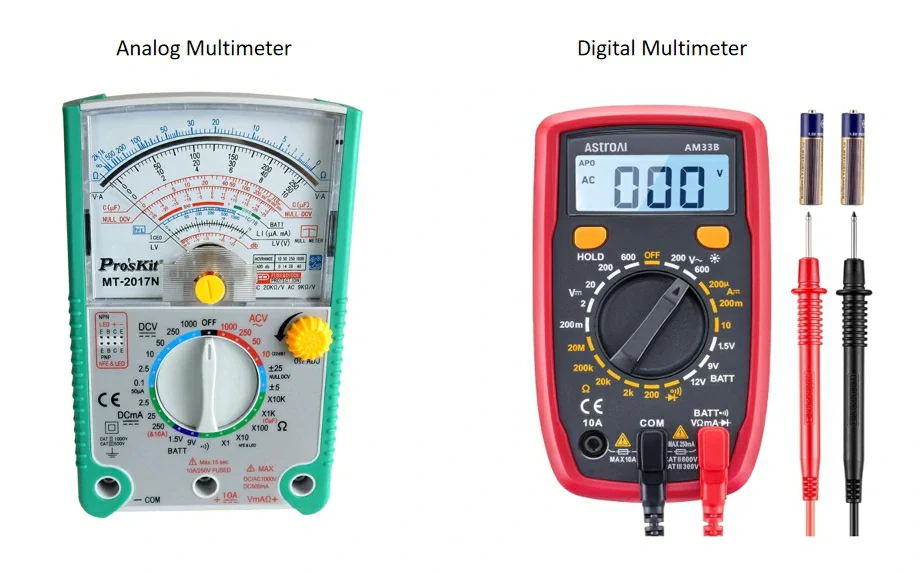
Digital vs. Analog Multimeter
| Feature | Digital Multimeter | Analog Multimeter |
|---|---|---|
| Display | Digital screen | Needle on scale |
| Accuracy | High | Lower |
| Ease of Use | Simple to read | Requires interpretation |
| Additional Features | Auto-ranging, data logging | Limited |
| Cost | Higher | Cheaper |
Recommendation: Use a digital multimeter for accurate readings. Auto-ranging and data logging features help track battery performance over time.
Battery Holder or Connectors
A battery holder secures the battery during testing, preventing accidental short circuits. Connectors ensure a stable connection between the battery terminals and the testing tools.
- Spring-loaded holders work well for small batteries (AA, AAA, 18650).
- Alligator clips provide secure connections for larger batteries (12V, power banks).
- Custom adapters allow testing of specialized lithium-ion cells.
Load Tester
A load tester simulates real-world conditions by applying a controlled discharge. It measures how well a battery maintains voltage under stress.
Why Use a Load Tester?
✔️ Identifies voltage drops under load
✔️ Detects battery inefficiencies before failure
✔️ Simulates actual usage conditions
How to Use:
- Connect the load tester to the battery terminals.
- Apply a test load matching the battery’s application.
- Monitor the voltage drop and discharge time.
- Compare results with expected performance.
Protective Gear (Gloves, Goggles)
Safety is critical when testing lithium-ion batteries. Improper handling can lead to short circuits, overheating, or even explosions.
Essential Protective Gear
- Insulated gloves → Prevents accidental contact with live circuits
- Safety goggles → Protects eyes from sparks or battery leakage
- Fire-resistant work surface → Reduces risk of fire in case of failure
⚠️ Caution: Avoid metal tools near battery terminals. Even a small contact can create a dangerous short circuit.
Notebook for Record Keeping
Tracking battery performance over time helps spot early signs of degradation. A dedicated notebook or digital spreadsheet ensures accurate record-keeping.
What to Record?
- Date of test
- Battery voltage (before and after load test)
- Capacity readings
- Internal resistance trends
- Observations (heat, swelling, unusual discharge rate)
Keeping organized records helps identify performance decline, ensuring replacements happen before failure.
Testing Methods for Lithium-Ion Battery Health
Lithium-ion batteries degrade over time, reducing efficiency and capacity. Proper testing helps detect issues early and ensures reliable performance. Below are essential methods for evaluating battery health.
How to Test Voltage with a Multimeter
Voltage reflects a battery’s charge level. A multimeter quickly determines if it’s in optimal condition.
Steps to Measure Voltage
- Set up the multimeter → Switch to DC voltage mode.
- Connect probes → Red probe to positive terminal, black probe to negative.
- Check the reading → Compare voltage with expected levels.
| Voltage Level | Battery Status |
|---|---|
| 12.6V – 13.6V | Fully charged (12V battery) |
| 10V – 12V | Partially discharged |
| Below 10V | Deep discharge or possible damage |
⚠️ Warning: Repeated deep discharge below 2.5V per cell can cause irreversible capacity loss.
Capacity Testing for Larger Batteries (12V 100Ah)
Capacity measures how much energy a battery stores and delivers. A lower-than-rated capacity signals aging or degradation.
How to Test Capacity
- Fully charge the battery.
- Use a capacity tester or apply a controlled discharge load.
- Monitor ampere-hours (Ah) until it reaches a low-voltage cutoff.
- Compare results to the original capacity rating.
| Battery Type | Rated Capacity | Expected After 500 Cycles |
|---|---|---|
| 12V 100Ah | 100 Ah | 85-90 Ah |
| 3.7V Li-ion (Smartphone) | 3,000 mAh | 2,500 mAh |
Signs of Capacity Loss:
✔️ Battery drains faster than expected
✔️ Charge time increases noticeably
✔️ Voltage drops quickly under load
Load Testing for Real-World Performance
Load testing simulates actual usage conditions, measuring voltage stability under demand.
Load Testing Steps
- Connect a load tester that matches the battery’s application.
- Monitor voltage drop as current flows.
- Observe temperature changes—excessive heat signals internal resistance issues.
Interpreting Results:
| Observation | Battery Health Status |
|---|---|
| Minimal voltage drop | Battery in good condition |
| Rapid voltage drop | High internal resistance, possible aging |
| Excessive heating | Efficiency loss, potential failure risk |
⚠️ Note: A battery that heats up under normal load may need replacement.
Testing Self-Discharge Rate
A good battery holds charge for weeks without significant loss. Self-discharge testing reveals internal aging or defects.
How to Test Self-Discharge
- Fully charge the battery.
- Disconnect and leave unused for several days/weeks.
- Measure voltage again to check how much charge remains.
| Time Left Unused | Expected Voltage Retention |
|---|---|
| 1 week | 98-99% of initial charge |
| 1 month | 95-98% retention |
| 3+ months | Below 90% suggests degradation |
Excessive self-discharge may indicate internal short circuits, aging cells, or damaged separators.
Advanced Testing Techniques
Standard battery tests check basic performance, but advanced methods reveal deeper issues affecting efficiency and lifespan. Internal resistance, impedance, and cold cranking amps (CCA) testing provide a more detailed analysis of lithium-ion battery health.
Internal Resistance Testing
Internal resistance affects a battery’s ability to deliver power efficiently. High resistance reduces performance, generates heat, and accelerates degradation.
Steps to Measure Internal Resistance with a Multimeter
- Set the multimeter to resistance mode (Ω).
- Connect the red probe to the positive terminal and the black probe to the negative.
- Take the resistance reading and compare with previous tests.
- Higher-than-normal resistance signals aging or internal damage.
What High Resistance Indicates
- Increased resistance over time → Battery is degrading
- Sudden spikes in resistance → Internal damage or separator failure
- Low, stable resistance → Healthy battery
| Resistance Level | Battery Condition |
|---|---|
| <50 mΩ | Excellent |
| 50-100 mΩ | Moderate wear |
| >100 mΩ | Aging, needs replacement |
⚠️ Note: Some multimeters lack precision for low-resistance readings. A dedicated battery resistance tester improves accuracy.
Impedance Testing
Impedance testing measures how well a battery conducts power under different frequencies. Unlike basic resistance testing, impedance reveals deeper degradation signs.
How to Perform Impedance Testing
- Use an impedance analyzer or battery tester.
- Apply an AC signal across the battery terminals.
- Measure impedance at multiple frequencies.
- Compare with baseline values—higher readings mean internal wear.
Why Impedance Testing Matters:
✔️ Detects early-stage degradation before capacity loss appears
✔️ Identifies aging-related resistance increase
✔️ Provides a more precise analysis than simple resistance tests
Ideal for: High-performance applications like EVs, power tools, and medical devices.
Cold Cranking Amps (CCA) Test for Car Batteries
CCA testing evaluates a battery’s ability to start a vehicle in cold conditions. A weak battery may struggle to deliver enough power to turn the engine.
How to Test CCA Using a Multimeter
- Set the multimeter to DC voltage mode.
- Connect probes → Red to positive, black to negative.
- Turn on the ignition (without starting the engine).
- Observe the voltage drop:
| CCA Test Voltage Drop | Battery Condition |
|---|---|
| >10V | Strong battery |
| 9V – 10V | Moderate wear |
| <9V | Weak battery, needs replacement |
⚠️ Warning: If voltage drops below 7V during the test, the battery may fail soon. Consider replacing it.
Safety Precautions When Testing Lithium-Ion Batteries
Lithium-ion batteries store high energy, making proper handling critical during testing. Failing to follow safety guidelines can result in fire, explosion, or toxic gas leaks. Below are essential precautions to ensure safe battery testing.
Avoid Short-Circuiting Battery Terminals
A short circuit causes rapid overheating, leading to possible fire or battery failure. Avoid accidental contact between positive and negative terminals.
How to Prevent Short Circuits
✔️ Use insulated tools and avoid metal objects near terminals
✔️ Handle one terminal at a time when using a multimeter
✔️ Keep batteries in separate containers to prevent unintended contact
| Risk Factor | Consequence |
|---|---|
| Metal objects touching terminals | Sparks, overheating, possible explosion |
| Connecting terminals with a wire | Instant short circuit, battery damage |
| Damaged insulation | Higher risk of electrical discharge |
⚠️ Warning: Even a brief short circuit can cause permanent damage or thermal runaway.
Do Not Expose to Extreme Heat or Puncture Battery
Lithium-ion batteries react violently to extreme heat or physical damage. Punctures can cause internal short circuits, leading to thermal runaway.
Avoid These Hazards
- Heat sources: Never place near flames, stoves, or direct sunlight
- Puncture risks: Avoid using sharp tools or excessive pressure
- Crushing danger: Do not squeeze or step on batteries
Signs of Heat Damage:
✔️ Battery feels excessively hot after normal use
✔️ Outer casing bulges or shows burn marks
✔️ Emission of smoke or unusual odor
Tip: Store batteries in a cool, dry place between 15°C – 25°C (59°F – 77°F).
Use Compatible Charger to Avoid Overcharging Damage
Overcharging stresses battery cells, leading to capacity loss, overheating, or failure. Always use a charger designed for lithium-ion batteries.
Best Charging Practices
✔️ Use a manufacturer-approved charger
✔️ Avoid charging overnight or unattended
✔️ Disconnect once fully charged (avoid trickle charging)
| Charging Issue | Risk Factor |
|---|---|
| Overcharging | Heat buildup, battery swelling |
| Using the wrong charger | Incorrect voltage, damage to battery cells |
| Leaving battery plugged in | Shortens lifespan, increases fire risk |
⚠️ Note: Never charge damaged or swollen batteries—they pose a fire hazard.
Stop Using if Battery Expands or Emits Odd Smell
Swelling, leaking, or chemical odors signal dangerous internal failure. Continuing use can lead to fire or explosion.
What to Do if a Battery Expands or Smells Odd
- Stop using immediately—disconnect from any device.
- Place in a fireproof container away from flammable materials.
- Do not puncture or dispose in trash—take it to a battery recycling center.
| Battery Condition | Action Required |
|---|---|
| Swollen or bloated | Stop using, dispose safely |
| Leaking electrolyte | Avoid contact, use gloves |
| Smells like burnt plastic | Potential fire hazard—store in a safe place |
Tip: If a battery heats up abnormally during testing, stop immediately.
Troubleshooting Common Battery Issues
Lithium-ion batteries degrade over time, leading to inconsistent performance, inaccurate readings, and reduced efficiency. Identifying these issues early prevents failures and extends battery life. Below are common problems and their solutions.
Inconsistent Readings
Voltage fluctuations or irregular measurements often indicate poor connections or incorrect testing setups.
Possible Causes
- Loose or corroded terminals → Prevents proper electrical contact
- Multimeter probes not making firm contact → Inconsistent voltage readings
- Wrong multimeter settings → Leads to inaccurate results
How to Fix It
✔️ Clean battery terminals with alcohol or a wire brush
✔️ Ensure a firm connection between probes and terminals
✔️ Set the multimeter correctly → Use DC voltage mode for lithium-ion batteries
| Symptom | Possible Cause | Solution |
|---|---|---|
| Voltage fluctuates | Loose probes | Secure connections |
| No reading on multimeter | Corroded terminals | Clean with alcohol |
| Readings change randomly | Incorrect setting | Check multimeter mode |
Tip: Always retest after cleaning terminals to confirm accuracy.
Multimeter Errors
A multimeter malfunction leads to incorrect battery readings, making troubleshooting difficult.
Common Issues
- Incorrect settings → Wrong voltage range gives false readings
- Weak multimeter battery → Low power affects measurement accuracy
- Faulty or damaged probes → Causes fluctuating or missing readings
How to Fix It
✔️ Check multimeter battery → Replace if voltage is low
✔️ Use the correct range → For a 3.7V lithium-ion battery, set it to DC 20V mode
✔️ Inspect probes for damage → Replace worn-out probes
| Issue | Cause | Solution |
|---|---|---|
| No reading at all | Dead multimeter battery | Replace battery |
| Jumping values | Damaged probes | Use new probes |
| Always reads zero | Wrong multimeter setting | Switch to correct mode |
⚠️ Warning: A failing multimeter can mislead battery diagnosis. If unsure, test with another meter.
Battery Performance Problems
An aging battery loses efficiency, leading to shorter runtime, voltage drops, and increased self-discharge.
Signs of an Aging Battery
✔️ Rapid discharge → Drains faster than before
✔️ Voltage fluctuations → Unstable under load
✔️ Swelling or overheating → Indicates internal damage
What to Do
- Compare current capacity with original rating → A significant drop means aging
- Perform a load test → If voltage drops too fast, replacement may be needed
- Check self-discharge rate → A battery that loses power overnight is likely degraded
| Battery Issue | Symptom | Solution |
|---|---|---|
| Rapid discharge | Shorter runtime | Capacity test |
| Voltage drops quickly | Unstable performance | Load test |
| Swelling or heat | Internal failure | Stop using immediately |
Tip: If a lithium-ion battery loses more than 20% capacity in 500 cycles, consider replacing it.
Conclusion
Testing lithium-ion batteries ensures they perform efficiently and last longer. Key methods include voltage checks, capacity testing, load tests, and advanced diagnostics.
Routine testing prevents failures, detects aging early, and improves safety. A well-maintained battery provides stable power and extended lifespan.
Handle batteries with care. Avoid short circuits, extreme heat, and overcharging. Regular checks keep devices running safely and efficiently.